
Last Updated on: 6/01/2017 (Since Picovico has relaunched with exciting new features and complete design changes, the blog has been updated based on Picovico 3.0)
Many of us love to click pictures or be inside the frame. Taking photos has become a part of our daily routine. The ever-growing passion of this generation is filling up every memory vault with tons of good and bad moments.
But have we ever felt that these captures are slowly missing their charm by rusting in some space of our device? How do we re-value them? Well, it is simple. You can make slideshow videos to always cherish the enduring memories.
Picovico is a web based video slideshow maker that can make your pictures look tremendously better with added music and special effects. It makes it easy for you to create a video with zero hassle. Just head towards https://app.picovico.com/ and login with your Facebook/ Google Plus account or use your email and password. If you are a new user, creating an account doesn’t take even a minute. Simply signup to get started.
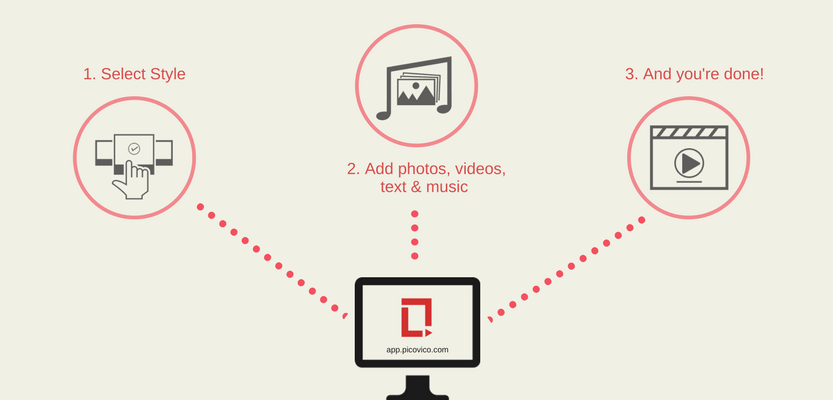
Without further delay, let’s get into making a video using Picovico:
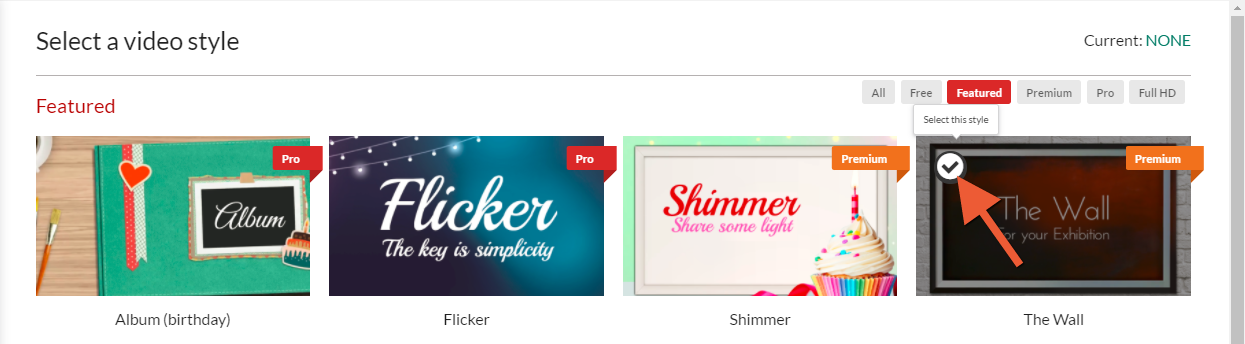
1. Select a style:
Adorn your priceless pictures and video clips with different styles. Picovico gives you a range of quality video styles to set with the mood.
Just choose a style and click on the tick mark that appears on the top-left corner of the style-thumbnail and you are through the first step.
2. Upload your content:
Adding pictures and video clips:
You can upload your photos and video clips from computer or import from Facebook. Just click on the ‘+’ icon to add the content.
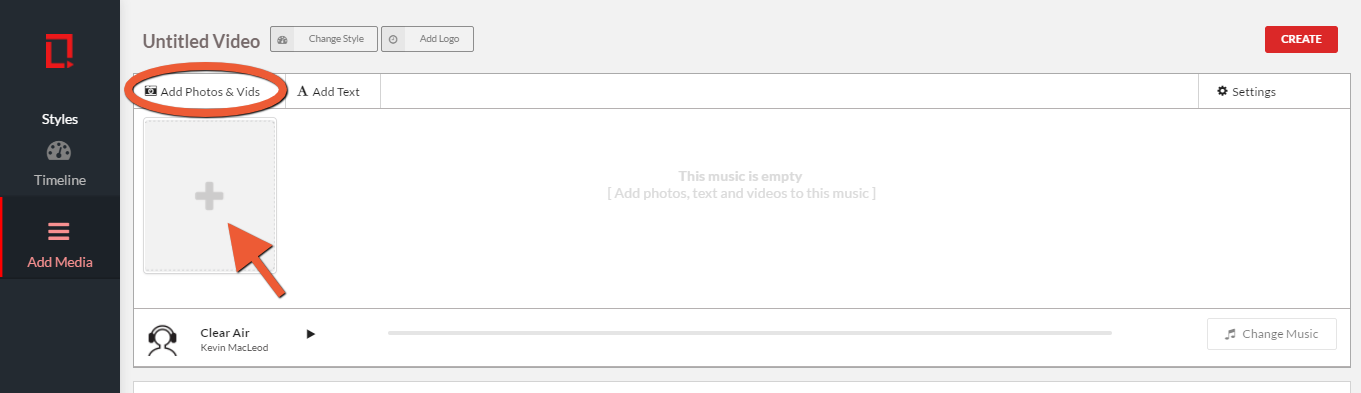
You will then get the following screen:
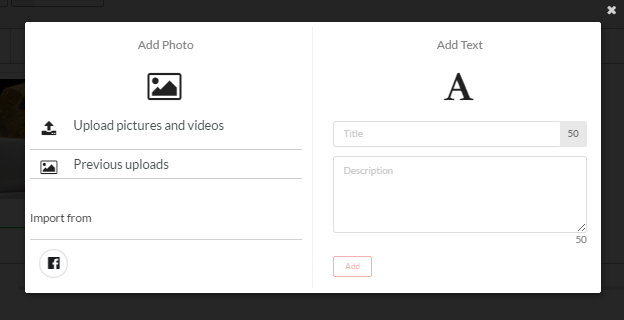
Select the desired files and add to your project.
Note: Only paid users can upload video-clips. If you want to use this feature then upgrade your account.
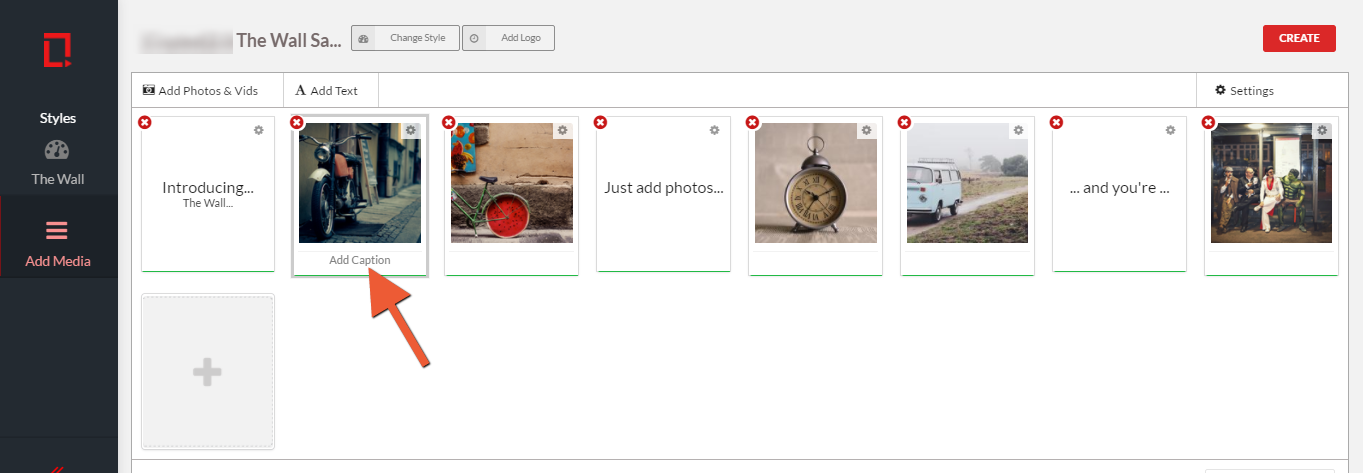
Add Caption:
To add captions to uploaded photos, simply click on the ‘Add Caption’ that appears below every added slide.
Or, you can even double click the image and you’ll be directed to add caption area.
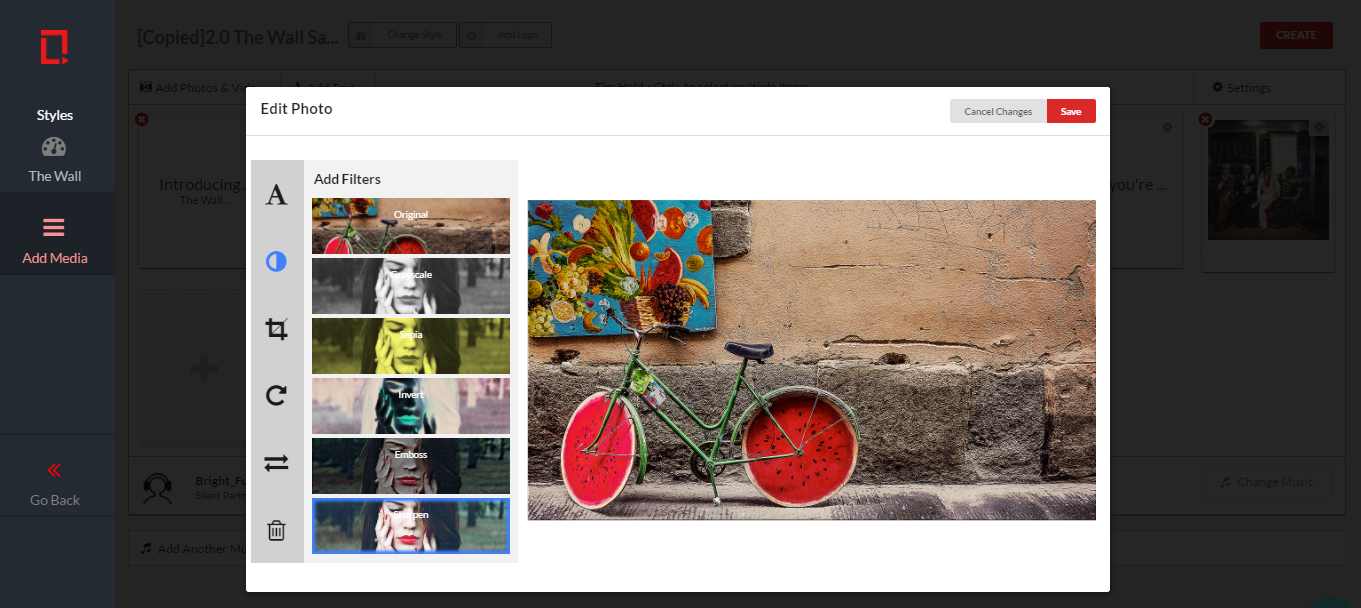
Edit Image:
Double clicking the image will give you an opportunity to edit it in terms of cropping, filters, rotation, axes flipping and image caption.
You can shuffle or rearrange the slides by dragging to adjust their positioning.
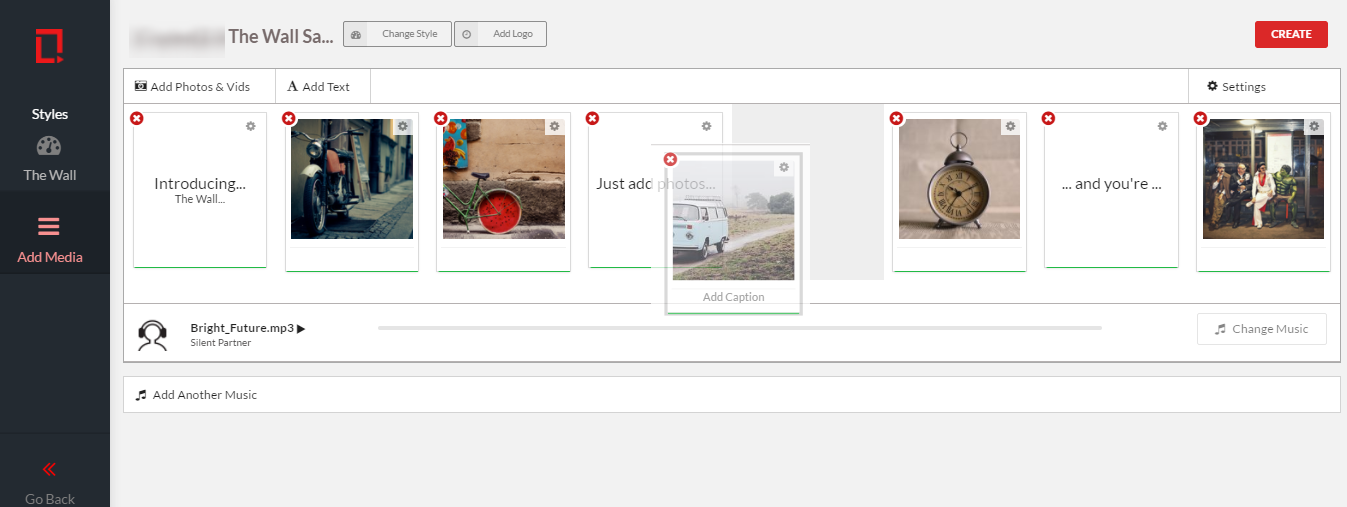
Choose Music
Once you are done with pictures and captions, you can change the audio of your video to a suitable music that you feel will best compliment your slideshow video.

You can either:
- Choose from the list of existing music files, or
- Add your own licensed piece of music.
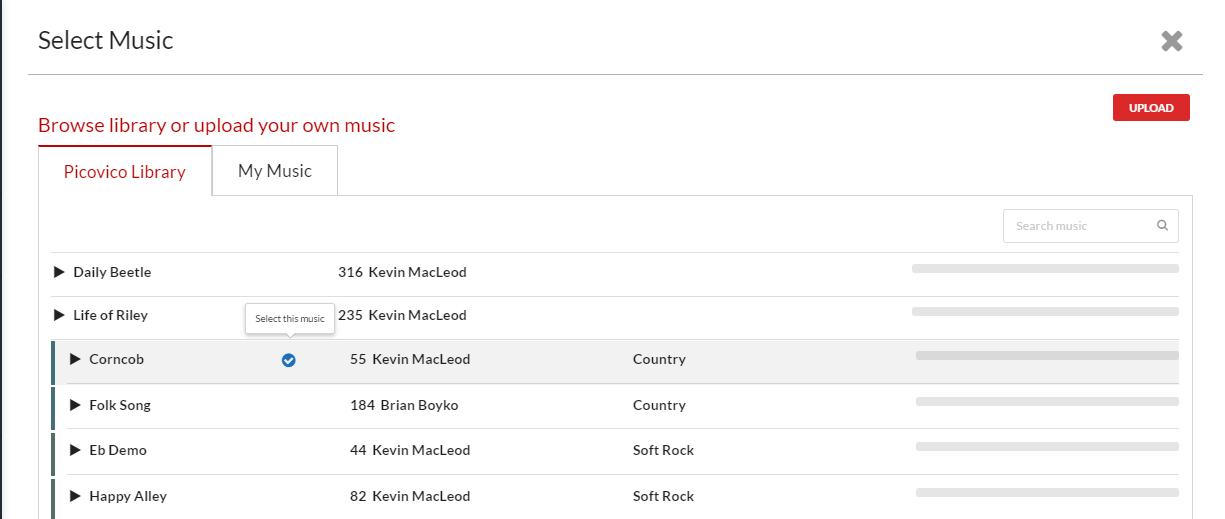
Note: If you want to add multiple music to your single project then upgrade your account.
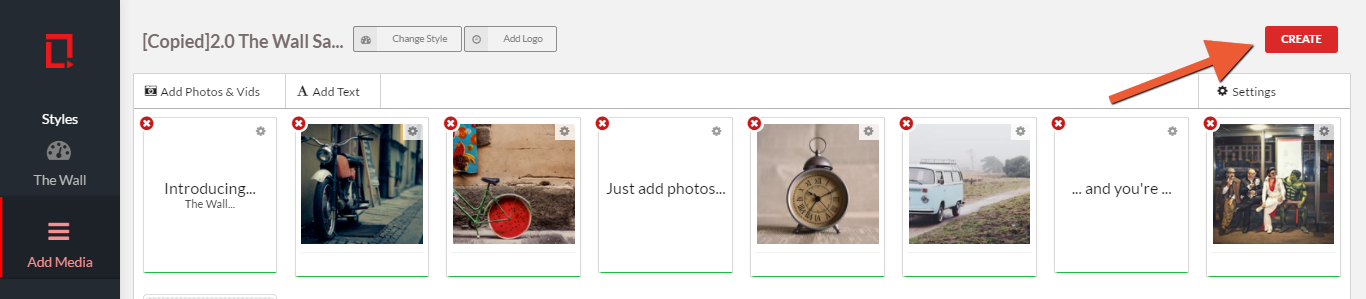
You can also add a brand logo, adjust the slide’s frame time, increase the number of audio files used in the video, besides adding photos, videos, text and music in this particular step.
When you are done with adding and adjusting the contents, click on the ‘Create’ button.
3. Finalize:
You are almost there. Set the video quality and click on ‘Finalize’ if you are satisfied. Else, choose to ‘Keep Editing’.
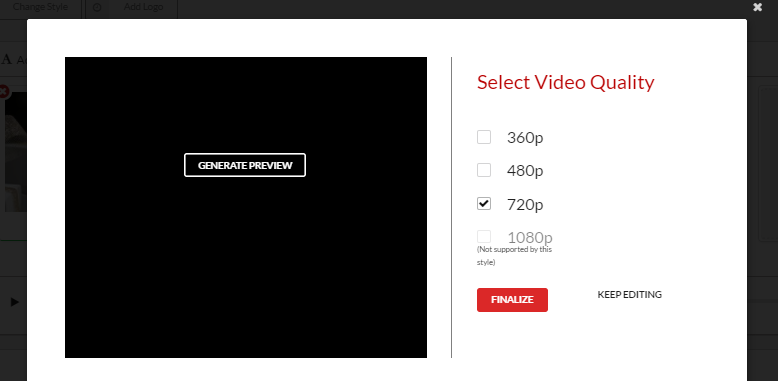
Note: If you want to create HD (720p) or Full HD (1080p) videos then you must upgrade your account. Free plan supports 360p video quality only.
4. Produce:
The video will now start creating. In this page, you will see a progress bar and some video information that you can update. You can name the video, add descriptions, adjust its privacy and save the information.
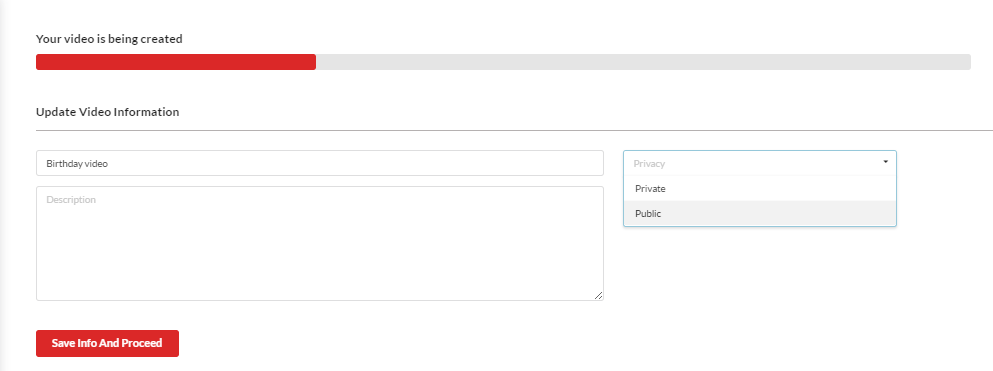
If you do not make any changes in this page, the video will be named as ‘Untitled Video’ and the privacy will be set as ‘Private’ in default.
However, these attributes can be changed anytime through the video settings option in the media player page.
The full length green signal on the progress bar indicates the completion of video making process and can be viewed by clicking on the ‘Click to play’ link.

Now you can share your freshly minted video of awesomeness on site on Facebook, Twitter or G+. You can also download and save a copy on your desktop.
It’s all about stimulating multiple senses of your viewers i.e., looking beautiful to the eyes & sounding good to the ears and Picovico lets you do that! It lets you make videos that keep viewers entertained through countless photos and express your story at the same time.
Use Picovico to make videos that people will actually want to watch!